

As a seasoned supplier of motorcycle inner tubes, I've witnessed firsthand the common mistakes that can occur during the installation process. These errors not only lead to premature inner tube failure but can also compromise the safety of the rider. In this blog post, I'll share some valuable tips on how to avoid mistakes when installing a motorcycle inner tube, ensuring a smooth and trouble - free ride.
1. Select the Right Inner Tube
The first step in avoiding installation mistakes is to choose the correct inner tube for your motorcycle. Using an incompatible inner tube can lead to a host of problems, including poor fit, reduced performance, and even blowouts.
When selecting an inner tube, consider the following factors:
- Size: The size of the inner tube must match the size of your motorcycle tire. This includes both the diameter and the width. For example, if your motorcycle requires a 19 Motorcycle Inner Tube, make sure you purchase one that is specifically designed for that size. Using a tube that is too small or too large can cause it to bunch up or stretch, increasing the risk of damage.
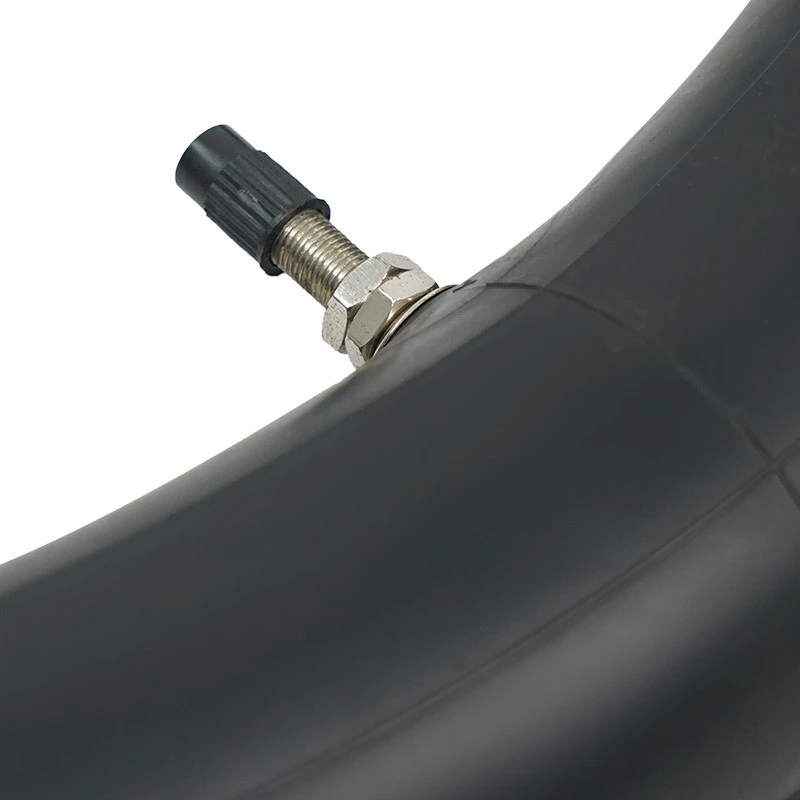
- Valve Type: There are two main types of valves used in motorcycle inner tubes: Schrader and Presta. Schrader valves are similar to those found on car tires, while Presta valves are thinner and more commonly used on high - performance motorcycles. Make sure you choose an inner tube with the correct valve type for your motorcycle.
- Load Rating: The load rating of the inner tube indicates the maximum weight it can support. It's important to choose an inner tube with a load rating that is appropriate for your motorcycle and the way you ride. Overloading an inner tube can cause it to overheat and fail.
2. Prepare the Tire and Rim
Proper preparation of the tire and rim is essential for a successful inner tube installation. Before you begin, make sure you have the following tools on hand: a tire iron, a valve core tool, a lubricant (such as soapy water), and a pressure gauge.
- Inspect the Tire and Rim: Carefully examine the tire and rim for any signs of damage, such as cuts, punctures, or corrosion. If you find any damage, it's important to address it before installing the new inner tube. A damaged tire or rim can cause the inner tube to fail prematurely.
- Clean the Tire and Rim: Use a clean cloth to remove any dirt, debris, or old rubber from the inside of the tire and the rim. This will help to ensure a good seal between the inner tube and the tire, reducing the risk of air leakage.
- Lubricate the Inner Tube: Apply a thin layer of lubricant to the inner tube, especially around the valve stem and the edges. This will make it easier to insert the tube into the tire and prevent it from getting pinched or damaged during installation.
3. Install the Inner Tube
Once you've selected the right inner tube and prepared the tire and rim, it's time to install the inner tube. Follow these steps to ensure a proper installation:
- Insert the Valve Stem: Carefully insert the valve stem through the valve hole in the rim. Make sure the valve is centered and straight.
- Place the Inner Tube in the Tire: Starting at the valve stem, gradually work the inner tube into the tire. Use your hands to smooth out any wrinkles or folds in the tube. Be careful not to pinch the tube between the tire and the rim.
- Mount the Tire on the Rim: Use a tire iron to mount the tire on the rim. Start at the valve stem and work your way around the tire, using the tire iron to pry the tire bead over the rim. Be careful not to damage the inner tube or the tire bead.
- Inflate the Inner Tube: Once the tire is mounted on the rim, use a pressure gauge to check the air pressure in the inner tube. Inflate the tube to the recommended pressure for your motorcycle. Over - inflating or under - inflating the tube can cause it to wear unevenly or fail.
4. Check for Air Leaks
After you've installed the inner tube and inflated it to the correct pressure, it's important to check for air leaks. There are several ways to do this:
- Visual Inspection: Look for any signs of air bubbles around the valve stem or the edges of the tire. If you see any bubbles, it indicates that there is an air leak.
- Soapy Water Test: Apply a solution of soapy water to the valve stem and the edges of the tire. If there is an air leak, the soap will create bubbles. This is a simple and effective way to detect small leaks that may not be visible to the naked eye.
- Pressure Test: Use a pressure gauge to check the air pressure in the inner tube over a period of time. If the pressure drops significantly, it indicates that there is an air leak.
5. Final Checks
Once you've installed the inner tube and checked for air leaks, it's important to perform a final check before you ride your motorcycle.
- Check the Valve Stem: Make sure the valve stem is straight and secure. Tighten the valve cap to prevent air from leaking out.
- Inspect the Tire: Check the tire for any signs of uneven wear or damage. Make sure the tire is properly seated on the rim and that there are no gaps or bulges.
- Test Ride: Take your motorcycle for a short test ride to make sure everything is working properly. Pay attention to how the motorcycle handles and if you notice any unusual noises or vibrations.
6. Common Mistakes to Avoid
Even with the best intentions, it's easy to make mistakes when installing a motorcycle inner tube. Here are some common mistakes to avoid:
- Not Lubricating the Inner Tube: Failing to lubricate the inner tube can make it difficult to insert into the tire and increase the risk of damage. Make sure you apply a thin layer of lubricant to the tube before installation.
- Pinching the Inner Tube: Pinching the inner tube between the tire and the rim is a common mistake that can cause it to puncture or tear. Be careful when using a tire iron to mount the tire on the rim and make sure the tube is not caught in the process.
- Over - Inflating or Under - Inflating the Inner Tube: Over - inflating or under - inflating the inner tube can cause it to wear unevenly or fail. Make sure you use a pressure gauge to check the air pressure and inflate the tube to the recommended pressure for your motorcycle.
- Not Checking for Air Leaks: Failing to check for air leaks after installation can lead to a slow loss of air and a flat tire. Always perform a thorough check for air leaks using one of the methods described above.
7. Conclusion
Installing a motorcycle inner tube may seem like a simple task, but it requires careful attention to detail to avoid mistakes. By following the tips outlined in this blog post, you can ensure a proper installation and reduce the risk of premature inner tube failure. Remember, if you're unsure about any aspect of the installation process, it's always a good idea to consult a professional.
As a leading supplier of motorcycle inner tubes, we offer a wide range of high - quality products, including 14 Inch Motorcycle Inner Tube and 16" Motorcycle Inner Tube. Our team of experts is always available to provide you with the support and advice you need to choose the right inner tube for your motorcycle. If you're interested in learning more about our products or have any questions about inner tube installation, please don't hesitate to contact us for a procurement discussion.

References
- Motorcycle Tire and Inner Tube Installation Guide, Various Motorcycle Manufacturers
- Inner Tube Selection and Maintenance Tips, Industry Publications